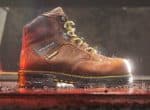

While investing in a pair of work boots, primarily leather work boots you are sure of two things, their age and the style they are going to add to your personality. Work boots easily adapt to our daily lifestyle and can tend to last for lifetime only if we take proper care of them.
Unfortunately, our workplaces are brimming with sharp objects, a number of equipment and rough surfaces that grant plenty of scuffs and scratches to our very precious work boots.
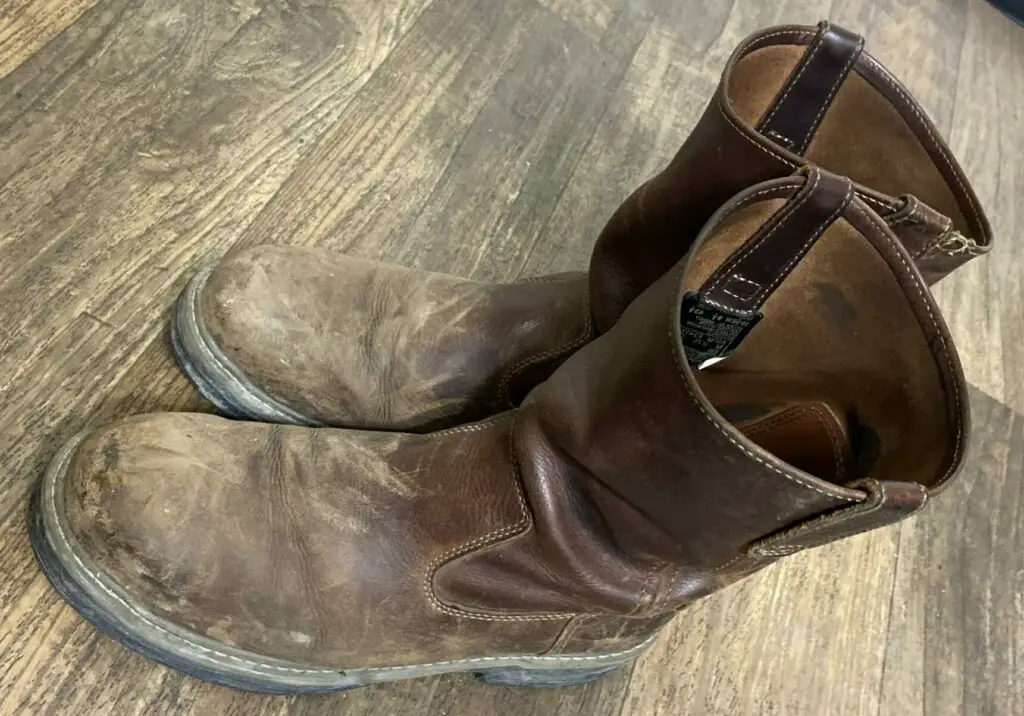 Though most of us think that fixing scuff is hard, it is the depth of the scuff and the damage it causes which determines how much repairing you need to do.
It is not at all a difficult task but definitely requires some supplies on hands and a little bit of your skills.
To fix the scuffed boots you need to prepare the boots first by cleaning then get rid of small marks first using oils, petroleum jelly with soap-water, cloth or towel and then moving to deep scuffs. These deep scuffs and scratches need more attention as they consist of some gaping cavities requiring a lot more than cleaning, that is repairment.
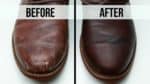
In most cases, these scuffs can be treated with little efforts to bring your work boots back to their presentable form.
If you really want to get rid of the ugly marks you started off with then read our article which has got some amazing techniques to say goodbye to hideous scuffs and scratches while improving the overall appearance and durability of your work boots.
How are scratches and cuts different from scuffs?
In most ways scratches are the same as scuffs except for the fact that the former are quite deep and are a bit difficult to repair. In utmost conditions, a scratch can be so deep that it might even cut the leather.
These tend to lessen the appearance of your boots and with profound scratches it becomes infeasible to completely fix or hide them. Sometimes, they add an appearance to the boots and you have got no other option but to embrace them.
You might get recommendations to use glue or fillers for hiding these scratches but trust me, these are just poor choices and may have a negative impact on the looks of the boots. The only solution is to polish them a bit and leave them the way they are.
Cuts
When a cut appears on the boots it separates the material into two distinct pieces while compromising with their outside layer.
Just like scratches, cuts can’t be restored but you can still maintain the appearance of the boots. But if you want you can fix them with some functional solutions like gluing the cut closed or sewing it back together.
Although, if your boots have encountered cuts then you might consider to replace them with a new pair.
Time to fix scuffed work boots
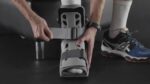
1.) Preparation
Your boots need to be prepared before repairment as it’s an important part of the process. But why?
While the surface of our footwear encounters scuffs and scratches, they reduce the softness and in turn create small pits and dents eventually allowing dirt to settle deep within the boots.
With time, these pits grow in size allowing more dirt to set in. Sooner or later, these scuffs turn into cracks.
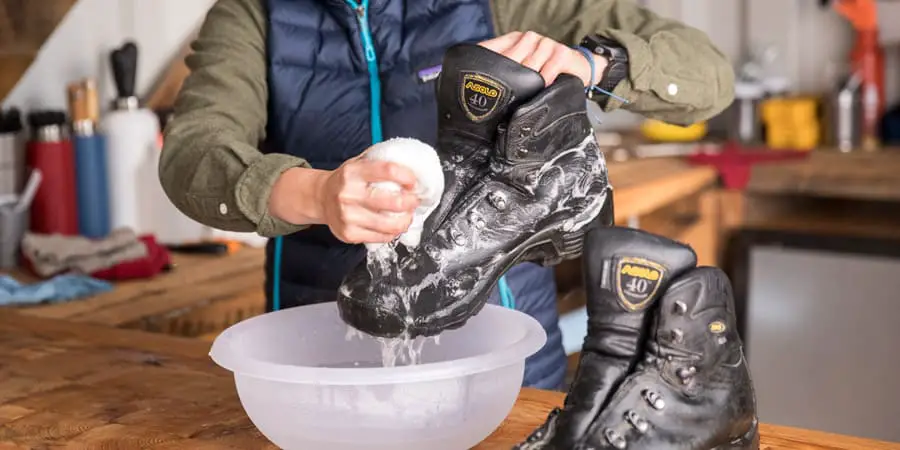
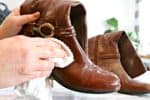
If you want to steer clear of this then save your boots from grime and dirt by cleaning them. For this all you need is a bit of warm water, a soft bristled brush and some soap.
Using all these ingredients, gently clean off the boots. If you can see the dirt sticking inside the crevices then you can use a thin paper to dig it out. Once you are sure that you have cleaned all the grime then allow the boots to dry out completely.
Fixing the scuffed faux leather boots/Cowboy Boots
You will need:
-
-
- A hair dryer
- Unscented and undyed petroleum jelly
- A clean colorfast or undyed cloth or towel
- Recoloring balm that matches the color of your boots
-
After you have cleaned the surface of your boots it’s time to follow these steps
Step 1: Exposing the scuffed area to heat using a hair dryer
Heat makes the surface of the boots especially the leather ones malleable thus allowing to blend any bumpy or rough surfaces in the boot together.
But you have to be a bit cautious while exposing your boot to heat. Basically, you have to test the heat on your hand before revealing it to the footwear. Keep in mind, if it’s too hot for your hand it’s hot enough for your boots.
Step 2: Rubbing-down the scuffed area with a clean cloth or towel
Once you have mended the surface with your hair dryer, use a clean cloth or towel to massage the surface in a circular direction. You can apply a bit of a pressure since the boots are quite durable.
This massage softens the edges of the scuffs while allowing the movement of the dye in the surrounding area to blend in, making the scuff diminish in appearance. Trust me, it’s not that complicated. All you have to do is just ‘buff-out’.
Step 3: Apply petroleum jelly or color-matched balm to the surface of your boots
When buffing is not successful you can just apply petroleum jelly to the scuff. This enriches and moisturizes the surface of the footwear and makes the color of the scuff match with the surrounding of the boot.
However petroleum jelly doesn’t always work and you can still see the difference in the coloration. In such cases you can use a color matched balm rubbing in circular motion. Once the balm dries you can apply a leather conditioner to seal the color.
Other methods to deal with superficial scuffs
For small scuffs which can take just minutes to get rid of, you can use vinegar, olive oil and a small soft cloth. All you have to do is just to dab the oil or vinegar on the cloth and wipe it in circular patterns.
Once you are done with the massage, keep the boots aside for at least 24 hours. This will allow the boots to soak in the excessive oil or vinegar making the scuffs barely noticeable.
For Deep Scuffs
Materials Required
-
-
- Color-match leather dye kit
- 2 clean foam brushes or sponges
- 1200-2000 grit sandpaper
- Disposable mixing cups
- Fillers
- Disposable plastic knife
-
More extreme measures are required if the damage to your boots is more severe and can’t be solved. After you have cleaned your boots, follow the below mentioned steps to fix them. Although, you can’t fix the blatant holes. In such cases, you have no other option but to replace your boots.
Step 1: Applying the color matched dye to the scuffed area
If you purchase a leather dye kit then you’ll get a base color which is usually black or brown and a tint color which has got many varieties to match the color of your boots.
Once you have mixed this tint color with the base, take a few drops of this in a sponge and dab this dye to the scuffed area.
Keep in mind that you have to dab it and not brush as brushing might leave streaks which might look unattractive.
Step 2: Filling the gash or gouge using fillers
Take a plastic knife and pervade the gauge or lacerated area with heavy fillers using gentle forces. Once you have completed this step, smooth out the fillers with the help of a blunt knife as much as you can.
Allow this filler to dry. Once the initial layer is completely dry, repeat the process until the top layer of the filler starts to match with the surrounding area.
Step 3: Time to sand the leather filler
Once the filler is completely dried out, take a sandpaper of around 120 grit and sand the scuffed area until it’s smooth and starts looking like the undamaged area. Periodically wipe down the area with a clean cloth.
Step 4: Time to apply the sealer
Once you have used the sandpaper, apply more color matched dye and allow it to dry. Following this step, you have to mix the sealer in different ratios to match the sheen in a boot.
You have to do it using the dab method, just like you did it with the dye, from the centre and working out. Use a hair dryer to wither the sealer. If you are not satisfied with the color then adjust the ratios in your mixture as needed.
Other method to deal with deep scuffs
We all know that more attention is needed on construction boots which have got profound damages. Apart from using the above mentioned ingredients, you can close the cavity by using some strong bonding or super glue. Just take a needle or toothpick and fill the scuff with the super glue.
If there are some serious tears then apply it on both the sides to close the gap. It needs to be done very cautiously as superglue dries quickly and is then hard to remove.
The removal process can cause further damage to your boots. After application, soak up the excess glue or bond with the help of a paper towel.
Giving the final touch
No matter whether your boots have got light or deep scuffs, never forget to apply a leather polish to give the finishing touch to your boots. This step will increase the flexibility and shine to the boots.
How to deal with other types of Scuffs?
Material Transfer Scuffs and Scuffs on the toes of the boots
These occur when any other object strikes against your boots and transfers the material. Like a black scuff mark which your boot can get when someone steps on it. It is easiest to remove as it is superficial and the boot is least damaged in it.
To remove the added material, you can use following methods:
-
-
- Shoe brush which is already designed to remove the scratches and scuffs.
-
-
-
- Pencil eraser which works great on simple scuffs since it is soft and easily removes the superficial materials.
-
-
-
- Baking soda or toothpaste for stubborn scuffs. Just mix it with water to create an abrasive paste and gently work them on the outer surface of the boots to remove the abrades.
-
Pro Tip: Never use nail polish remover, rubbing alcohol, dish soap or any other type of chemical to remove scuffs. These materials have the potential to dry out or crack your boots.
Final Thoughts
Enough of being embarrassed by the scuffs and scratches. You no longer have to spend money on another pair of boots.
Before tossing those scuffed work boots in the trash, follow the above mentioned tricks and forget about all those ugly marks with integrity and make your work boots look brand new once again!